REVIEW · SYDNEY
Sydney Photography Course in the Historic Rocks Area
Book on Viator →Operated by Alfonso Calero Photography · Bookable on Viator
A photo tour in The Rocks turns Sydney into a hands-on classroom. You’ll get guided practice in manual mode while you hunt strong angles around the Harbour Bridge and Opera House area. It’s a great way to go from auto-mode guessing to intentional shooting without spending a whole day on it.
Two things I really like: the guidance is built around practical camera settings (so you can actually use what you learn right away), and the group stays small—max 10 travelers—which makes it easier to get answers to your specific questions. You’re also working in one of Sydney’s most photogenic neighborhoods, with laneways and historic sandstone buildings giving you lots to shoot besides the big postcard landmarks.
One possible drawback: you need to bring your own camera and be ready to learn while walking and looking for light. If you hate moving around or you’re expecting a relaxed sit-down lecture, this might feel more active than you planned.
In This Review
- Key highlights you’ll feel right away
- The Rocks as a real photo classroom
- Price and what you’re buying for €154
- Manual mode lessons that actually change your photos
- Stop 1 in The Rocks: laneways, stone texture, and angle hunting
- Stop 2 and regrouping: turning practice into repeatable settings
- The Harbour Bridge and Opera House targets (and how light affects them)
- Small group size: the difference between copying and learning
- What to bring and how to prep fast
- Weather matters more than you think
- Who this tour suits best
- Should you book? My decision guide
- FAQ
- Where does the tour start and end?
- How long is the Sydney Photography Course in The Rocks?
- How much does the tour cost?
- Do I need to bring a camera?
- What is included in the price?
- What is not included?
- How many people are in the group?
- Do I get to choose between afternoon and nighttime?
- What happens if the weather is bad?
- Is free cancellation available?
- Are service animals allowed?
Key highlights you’ll feel right away

- Manual mode coaching for exposure, shutter speed, and composition, not just random tips
- Small-group attention with room to experiment and get feedback
- Vantage-point photo stops focused on iconic Sydney views plus The Rocks details
- Afternoon or nighttime options so you can match the light to your style
- Bring-your-own-camera practice so lessons connect directly to your gear
- Course notes included to help you repeat the steps later
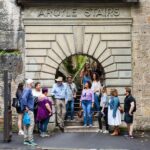
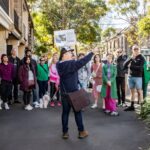
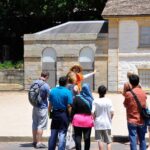
The Rocks as a real photo classroom

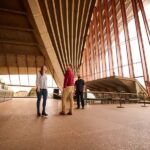
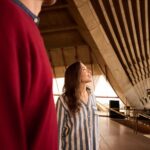
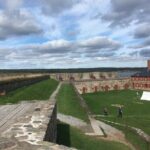
The Rocks is perfect for learning because it’s full of different “problems” you need to solve with a camera. You’ve got textured historic sandstone buildings, tight laneways, and then suddenly you open up to wider Harbour views. That mix is exactly what helps you understand composition and exposure in a way that a single viewpoint can’t.
I like that the tour isn’t only about one famous scene. You’re getting practice framing foreground details while also planning for big bright backgrounds (like water and sky near the harbour area). That’s where many photos go wrong when people rely on auto mode.
This also helps if you’ve got a compact camera, a mirrorless setup, or a DSLR. Manual settings might feel intimidating at first, but The Rocks gives you clear, repeatable cues—lines, angles, doorways, stone textures—that let you test what your shutter speed and exposure changes actually do.
You can also read our reviews of more historical tours in Sydney
Price and what you’re buying for €154
€154 for about 2 hours 30 minutes sounds reasonable because the tour isn’t trying to sell you “Sydney vibes.” You’re paying for instruction time plus a professional guide who can watch your results and steer you toward better choices on the spot.
You also get course notes, which matters more than you might think. A lot of photo learning falls apart after the tour ends because you forget the exact reasoning behind your settings. Notes give you a way to refresh the steps later, even if you’re new to manual mode.
What’s not included is also clear: no food or drinks, and there’s no hotel pickup/drop-off. So budget a bit for transit snacks if you want them, and plan to meet at Kendall Ln, The Rocks NSW 2000.
Manual mode lessons that actually change your photos
This is the core of the experience: you’ll learn to take better photos by gaining control of camera settings. The teaching focus includes composition plus exposure and shutter speed decisions—basically the stuff that turns “nice idea” into a photo with a clear look.
Here’s why that coaching is valuable. When you shoot in auto, the camera decides how bright things should be and how sharp motion should be. Manual mode puts you back in charge, and you start to build a repeatable process: set exposure, choose a shutter speed for the effect you want, then compose for impact.
I also like the way this tour encourages experimentation. You’re not stuck doing one “correct” shot. You’re guided to test ideas—then adjust based on what you see. That’s how you learn faster than by just copying someone else’s settings.
Stop 1 in The Rocks: laneways, stone texture, and angle hunting
The tour begins in The Rocks, which sets the tone for the whole session. Expect to work around the district’s laneways and historic sites as you look for good photo locations. This first section is about building your eye: where to stand, how to frame, and how to think about depth and light.
A useful way to think of this stop is as a composition workshop disguised as sightseeing. You’ll be practicing skills like:
- positioning yourself to use leading lines from streets and walls
- balancing dark stone against brighter sky or harbour light
- choosing a viewpoint that makes the scene feel intentional rather than random
There’s a real benefit to doing this first. If you start with the Harbour Bridge and Opera House without learning the basics, you often end up with blown highlights or muddy exposure. By the time you reach wider views, you’ll be better prepared to manage brightness differences.
One practical consideration: laneways can mean uneven steps and tight corners. Wear shoes that are comfortable for walking and be ready to adjust your camera position quickly.
Stop 2 and regrouping: turning practice into repeatable settings
The next part of the tour is listed as Sydney Photography Tours, which usually signals a more structured coaching segment after the initial exploration. Even without a lot of extra bells in the schedule, this second stop is where the learning should click: you connect what you practiced in The Rocks with how you’ll set your camera going forward.
From what’s emphasized in the course style—customized lessons and advice on manual mode—this is where you’ll likely fine-tune your approach. Instead of chasing only the perfect shot, you learn what to change when a photo looks too dark, too bright, or not sharp in the way you expected.
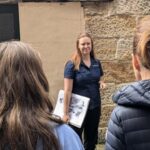
This is also where personalized attention becomes a big deal. With a maximum group size of 10 travelers, it’s easier to ask questions and get specific feedback based on what you’re trying to capture. If you’ve ever walked through a city taking photos for hours with zero guidance, you know how frustrating it can be to keep repeating the same mistake.
You can also read our reviews of more photography tours in Sydney
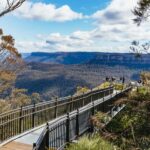
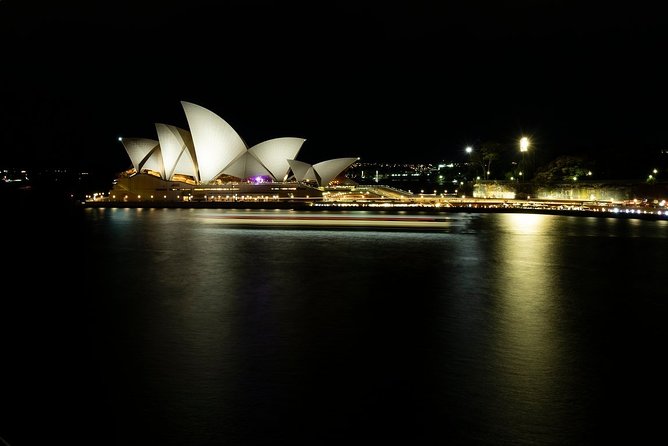
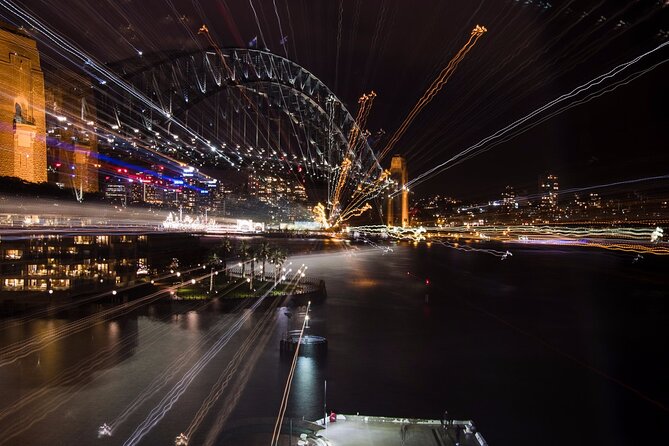
The Harbour Bridge and Opera House targets (and how light affects them)
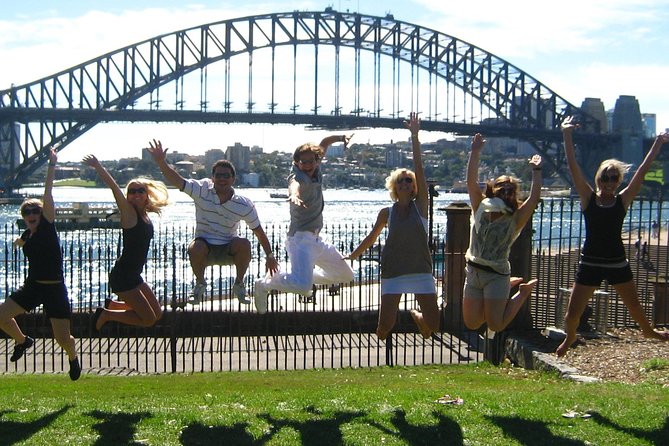
One of the best parts of this experience is the focus on photo ops you actually want: Sydney Harbour Bridge and Sydney Opera House, plus the historic sandstone buildings around The Rocks. These aren’t random landmarks included for “scope.” They’re targets tied to the skills you’re practicing.
Light is everything for these scenes, and the tour’s format helps you manage it. If you book the afternoon class, you’ll deal with brighter conditions and higher contrast, which tests exposure choices. If you book the nighttime class, you’ll face different challenges—lights, reflections, and the need to control shutter speed to avoid turning everything into mush.
That’s why the class choice matters. Matching the time of day to the look you want can make your learning feel practical instead of abstract. And because you’re learning with a guide, you’ll understand what to adjust when conditions shift.
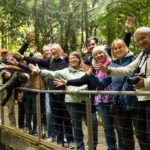
Small group size: the difference between copying and learning
The tour caps at 10 travelers, and that detail matters for photo learning. When a group is big, the guide has to teach to the average person. Here, you’re more likely to get feedback that matches your camera style and your personal questions.
The guide for this experience is Alfonso Calero Photography. From what the class vibe seems designed to deliver—approachable, friendly, and focused on real results—expect a tone that makes it easier to ask questions without feeling silly. That’s huge when you’re trying to change settings like shutter speed and exposure while also composing.
I’d especially recommend this style if you’re the type who wants to understand the why, not just receive a list of settings. Manual mode becomes a language, and the faster you learn it, the more fun Sydney turns into.
What to bring and how to prep fast
You’ll need to bring your own camera. That sounds obvious, but it’s worth planning your gear checks ahead of time so you’re not stuck at the start figuring out menus while everyone else is learning.
Here’s what I suggest:
- fully charged battery (and a spare if you have one)
- memory card with room for experimentation
- a basic comfort plan for walking through The Rocks
Also, be ready to shoot more than once. Even if you love one view immediately, try a second approach with a different shutter speed or exposure idea. That repetition is where the lesson sticks.
No food or drinks are included. If you arrive hungry, you’ll lose focus. Bring a water bottle if it fits your personal routine, and plan to eat before or after.
Weather matters more than you think
This experience requires good weather. If conditions are poor enough, the tour can be canceled and you’ll be offered another date or a full refund. That makes sense because the route depends on you being able to walk and shoot at outdoor vantage points.
I’d treat this like any outdoor photo session in a city: check the forecast the day before, and don’t assume you can power through heavy rain. If the skies look promising, you’ll get the best chance to capture the Harbour-area lighting you came for.
Who this tour suits best
This class is a strong fit if you:
- want help mastering manual mode rather than just taking better pictures by luck
- enjoy walking tours that teach you as you move
- want small-group attention and a guide who can adapt to your questions
- want both iconic views and street-level details in one session
It may be less ideal if you want a totally relaxed “stand and admire” experience, or if you’re expecting someone to carry your camera and handle everything for you. You’ll be learning hands-on, and that’s the point.
Should you book? My decision guide
Book it if you want a structured way to improve and you’re willing to experiment. At €154 for about 2.5 hours, plus course notes and a small group limit, it’s good value for people who feel stuck in auto mode or who keep getting frustrated by inconsistent exposure and shutter speed results.
Skip it if you’re not interested in manual control or you’d rather spend your time wandering without coaching. Also consider whether you can handle a photo-walk pace; the best results come from being present for multiple practice moments.
If you’re aiming to shoot the Harbour Bridge and Opera House with more control and less guesswork, this is one of the more practical ways to get there—especially in a neighborhood like The Rocks, where you can practice fundamentals and still end up with great Sydney images.
FAQ
Where does the tour start and end?
It starts at Kendall Ln, The Rocks NSW 2000, Australia and ends back at the meeting point.
How long is the Sydney Photography Course in The Rocks?
The duration is about 2 hours 30 minutes.
How much does the tour cost?
The price is €154.
Do I need to bring a camera?
Yes. Bring your own camera.
What is included in the price?
Included are a photography tutor/guide and course notes, plus photography advice.
What is not included?
Food and drinks are not included, and there is no hotel pickup or drop-off.
How many people are in the group?
The tour has a maximum of 10 travelers.
Do I get to choose between afternoon and nighttime?
Yes. You can choose from an afternoon or nighttime class.
What happens if the weather is bad?
The experience requires good weather. If it’s canceled due to poor weather, you’ll be offered a different date or a full refund.
Is free cancellation available?
Yes. You can cancel up to 24 hours in advance for a full refund. If you cancel less than 24 hours before the start time, you won’t receive a refund.
Are service animals allowed?
Yes, service animals are allowed.
You Might Also Enjoy

More Photography Tours in Sydney
More Historical Tours in Sydney
More Tour Reviews in Sydney
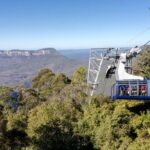
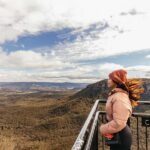
- Blue Mountains Small-Group Tour from Sydney with Scenic World,Sydney Zoo & Ferry
★ 5.0 · 3,709 reviews