REVIEW · BLUE MOUNTAINS
Katoomba: Blue Mountains Full-Day Hop-On Hop-Off Bus Tour
Book on GetYourGuide →Operated by Blue Mountains Explorer Bus · Bookable on GetYourGuide
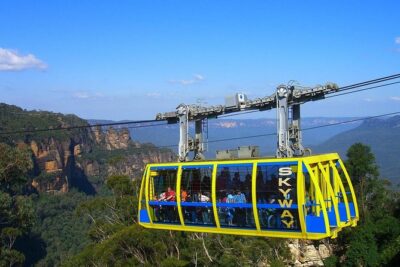
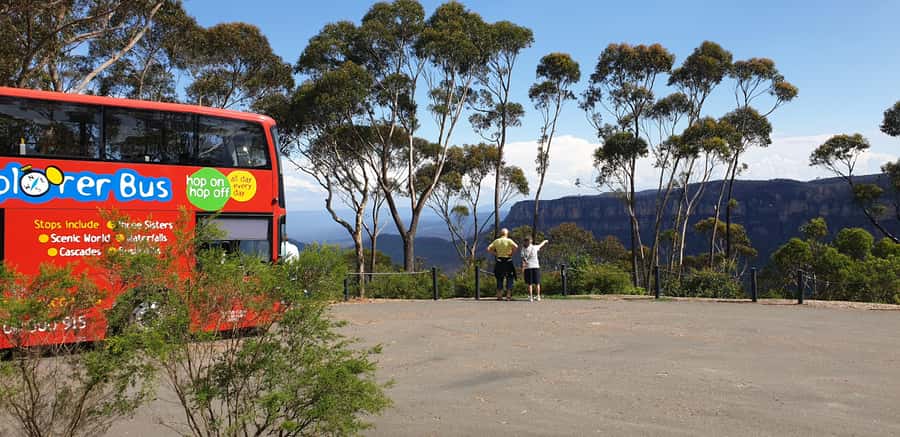
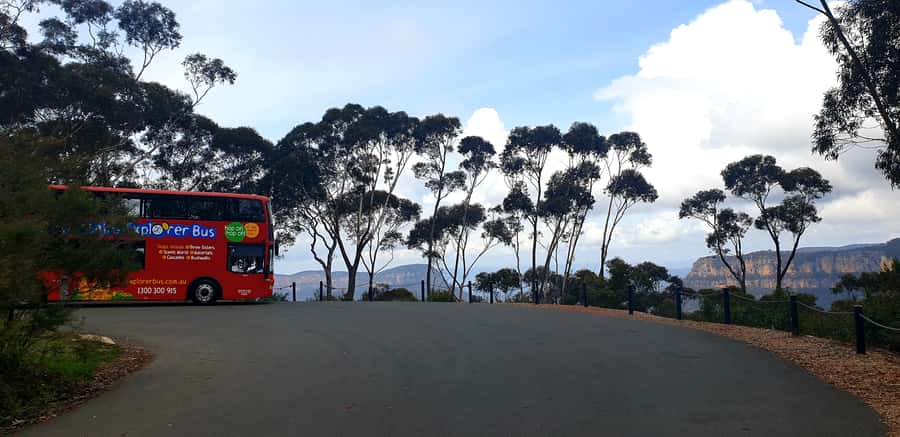
The Blue Mountains feel huge from up high. This full-day hop-on hop-off pass lets you ride the iconic Blue Mountains Explorer Bus around Katoomba and Leura, then jump out for cliff walks, waterfalls, and lookouts at your own pace, not on a tight script. I especially like the driver/guide commentary and the included guidebook with maps and walking routes—both make the day feel planned even when you’re improvising. The main trade-off is timing: buses run about every hour, so if you hop off and then linger, you can end up waiting for the next bus.
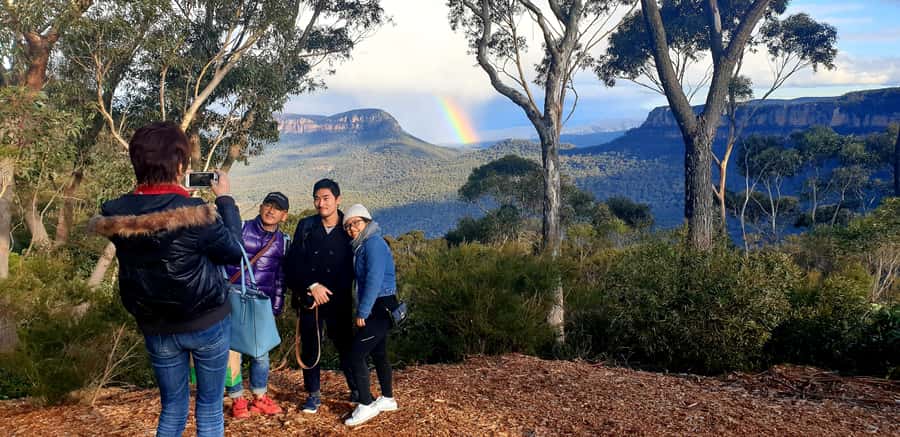
Two other small things I really value: you start right in Katoomba near the train station area, and the route is designed for mixing big wow moments (like Echo Point and the Three Sisters) with calmer breaks (gardens, galleries, and cafés). If you’re hoping for a fully carefree day with minimal walking, you’ll want to choose your trails carefully—some of the cliff-edge and valley routes can be uneven and steep.
In This Review
- Quick take: what’s great and what to watch
- What $38 really buys you on the Blue Mountains Explorer Bus
- Getting started in Katoomba: meeting point, timing, and how to pace
- Stop-by-stop: cliff walks, falls, lookouts, and Leura breaks
- Katoomba cliff top area (Stop 1): start with instant wow
- Honeymoon Lookout to Echo Point and the Three Sisters (Stop 6 + Prince Henry Cliff Walk)
- Katoomba Cascades and Katoomba Falls: a calmer pause
- Furber Steps into the Jamison Valley: for when you want the stairs
- Narrow Neck Lookout and Cahill’s Lookout: viewpoint hopping with purpose
- Leura Village: cafés, shops, and a different pace
- Gordon Falls and Olympian Rock Lookout: nature scenes with drama
- Pool of Siloam: swim-under-the-water energy
- Leura Cascades: finish with one last water-and-view stop
- The guidebook + driver tips combo: why you get more than a bus ride
- Walking reality: what to pack and how to choose routes without stress
- Comfort, schedule, and the one thing that can slow you down
- Who this Blue Mountains Explorer Bus pass suits best
- Should you book this hop-on hop-off Blue Mountains tour?
- FAQ
- How long is the Blue Mountains Explorer Bus tour?
- Where do I meet the bus in Katoomba?
- How often do the buses depart?
- Which famous viewpoints are included?
- What’s included with the ticket besides bus transport?
- Is food included in the price?
- What should I bring for the day?
- Is it wheelchair accessible, and are pets allowed?
- Can I cancel and get a refund?
Quick take: what’s great and what to watch
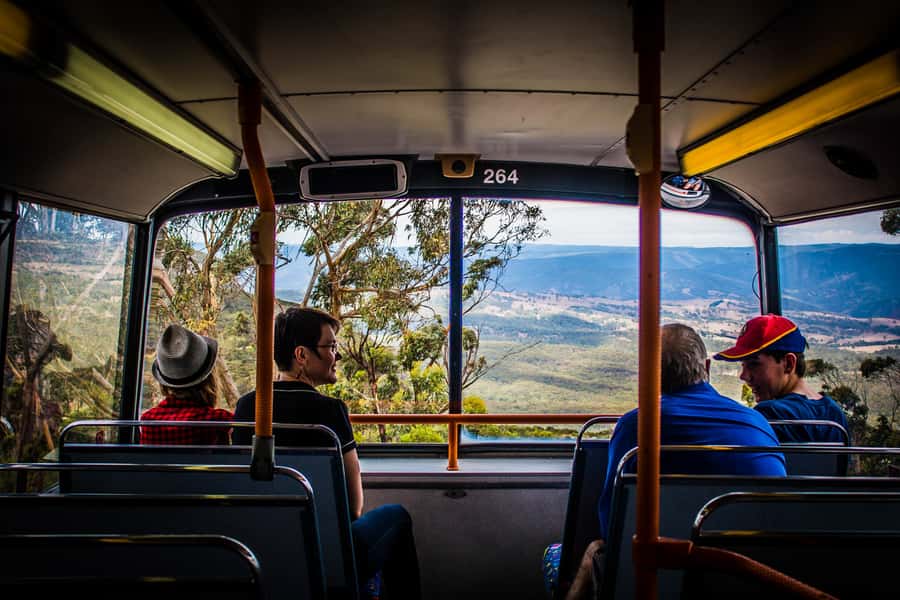
- Top-deck views fast: you get repeated panoramic looks while you move between stops.
- Flexible pacing: hop off for a short stroll or stay longer, then return when you’re ready.
- Stop-by-stop guidance: onboard commentary plus an included guidebook with maps and walking routes helps you pick the right walk for your energy.
- Echo Point and the Three Sisters: the route includes the Prince Henry Cliff Walk area and the classic viewpoints around Stop 6.
- Walk difficulty varies: a few popular routes can feel harder than the quick descriptions suggest, so bring sturdy shoes and expect stairs/loose rock.
- Hourly buses mean waiting: it’s workable, but you’ll lose time if you’re jumping between far-apart stops.
What $38 really buys you on the Blue Mountains Explorer Bus
At about $38 per person for a full day, this is the kind of value that works best when you want to see a lot without renting a car. You’re not just paying for transport—you’re paying for orientation. The driver/guide gives live commentary as you travel, and you also get a guidebook with maps and walking routes so you can turn the bus stops into an actual game plan.
The hop-on hop-off format is the key. You can build a day that matches your legs and your mood: one person can chase viewpoints, another can take a slower loop and grab coffee between buses. That flexibility matters a lot in the Blue Mountains, where the best spots often involve short walks and then sudden drops, stairs, or cliff paths.
The main consideration: the schedule is hourly. That’s totally fine for a day of sightseeing, but it means you should avoid a strategy like hop off, cram in a long hike, and then plan to instantly hop back on for the next far stop. Build in a little slack.
You can also read our reviews of more tours and experiences in Blue Mountains


Getting started in Katoomba: meeting point, timing, and how to pace
You’ll meet at the Booking Office at the top of the railway station steps in Katoomba. From there, you can board and get your bearings quickly, which is a big deal if you’re arriving by train from Sydney or just want a smooth start.
Departures run about every hour. The first departure is 9:15 AM and covers Stops 1 to 6, then buses continue hourly from 9:45 AM to 4:45 PM. If your goal is to see as many famous Katoomba highlights as possible—especially Echo Point and the Three Sisters—starting around 9:15 gives you more chances to hop between stops before the day gets crowded.
One practical rhythm I like for this kind of pass: pick one “anchor” activity early (the big viewpoint walk), then treat the rest as a choose-your-own-day loop. If you want an easier plan, you can also stay on longer for the circuit and use only a few hop-offs.
Stop-by-stop: cliff walks, falls, lookouts, and Leura breaks
Below is how the day tends to unfold once you get on the bus. Use it like a menu. Hop off when something fits your energy level, then return to the bus at the next stop when you’re ready.
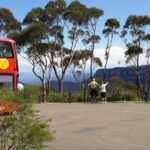
Katoomba cliff top area (Stop 1): start with instant wow
You’ll hop on at Stop 1 in Katoomba and within minutes you’re at the cliff top edge. This is one of the best ways to begin because you get big views early, before your day gets complicated. The cliff-edge walks here are usually a quick taste of what the Blue Mountains do best: dramatic drop-offs, valley sightlines, and photo angles that look different with every turn.
If you’re planning to do any longer walking later, this is a smart warm-up stop rather than a day-ender.
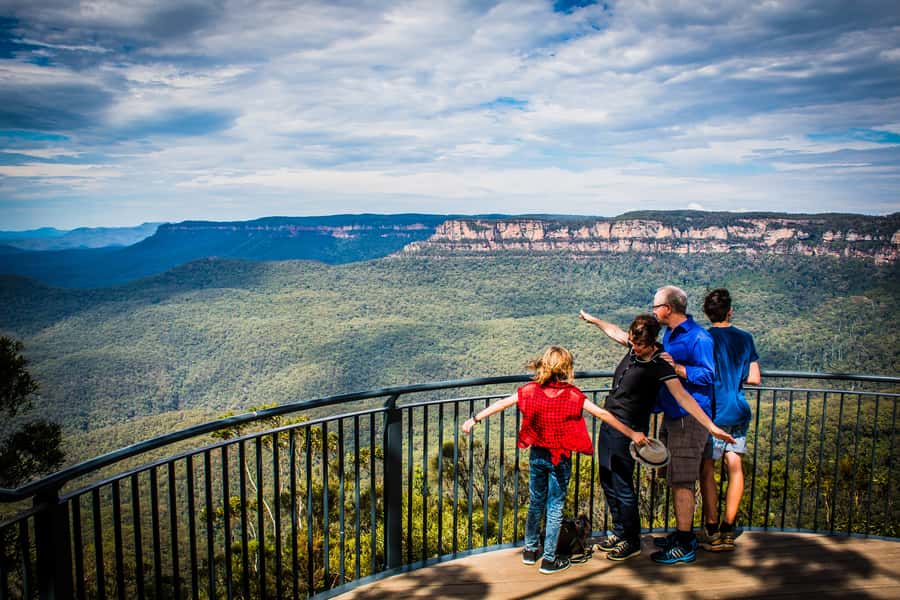
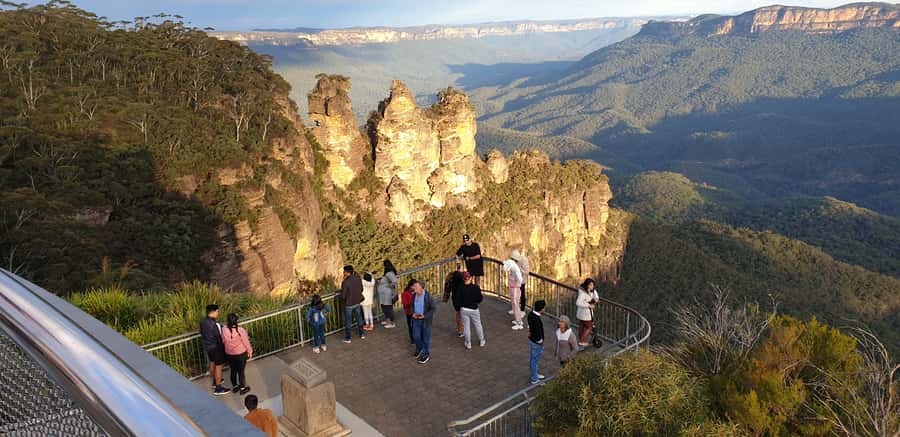
Honeymoon Lookout to Echo Point and the Three Sisters (Stop 6 + Prince Henry Cliff Walk)
Stop 6 is the big “wow factor” zone. Hop off at Honeymoon Lookout, then walk the Prince Henry Cliff Walk toward Echo Point and the Three Sisters. This is the classic Blue Mountains experience—cliff views, famous rock formations, and a well-known path that many people love because it connects viewpoints without requiring backtracking to the same parking area.
Here’s what I’d plan around: even if the trail is marketed as a manageable walk, treat it as a real cliff walk. It’s exposed and you’re on uneven ground in spots. Wear shoes with decent grip, and keep an eye on footing if the weather is damp.
In practice, this is also where the driver tips matter. People often share that drivers suggest which segment to walk and when to reboard for the rest of the day. Names that came up with great commentary include Mark and David, and that kind of advice is often more useful than a generic map.


Katoomba Cascades and Katoomba Falls: a calmer pause
After the cliff-zone, you’ll head toward Katoomba Cascades and Katoomba Falls. This is a nice reset. Instead of focusing on huge valley distances, you’re close to water and greenery, which can feel like a breather after the wide-open lookouts.
If you’re traveling with mixed walking abilities, this stop is often easier to fit. You can spend less time here if your feet are tired, or stay longer if you want photos and a slower walk.
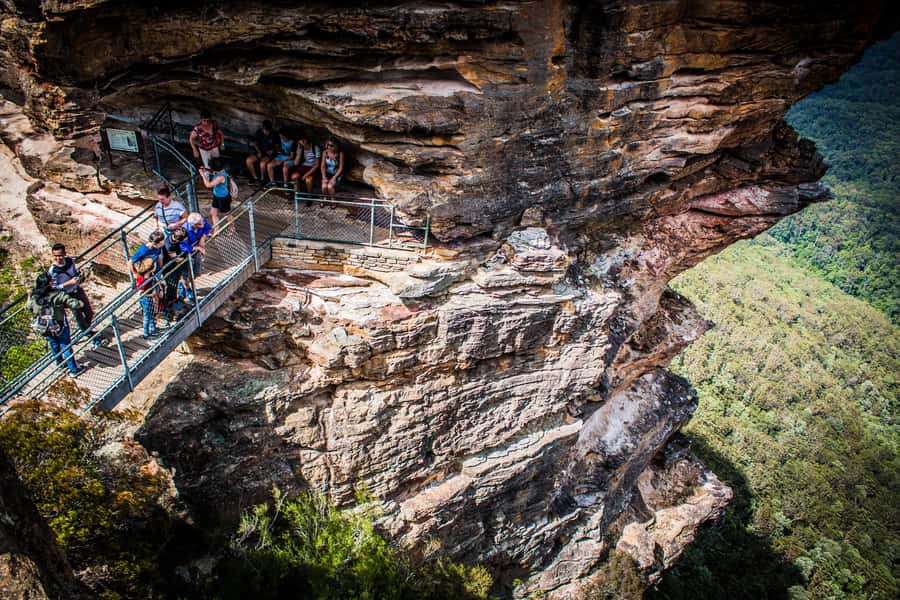
Furber Steps into the Jamison Valley: for when you want the stairs
Next up is Furber Steps into the Jamison Valley. This is a “choose your comfort level” stop. Stairs can turn the temperature and effort level in a hurry, and the Jamison Valley terrain is not flat.
This is also where I’d use the guidebook you’re given. It includes walking routes, so you can match the idea of the hike to your actual pace. If stairs are not your thing, you can keep it to lookouts and viewpoints and save the bigger valley walking for another day.
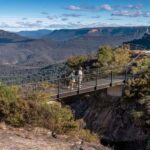
Narrow Neck Lookout and Cahill’s Lookout: viewpoint hopping with purpose
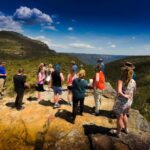
You’ll also get access to Narrow Neck Lookout and Cahill’s Lookout. These are the kinds of spots where timing matters less than your ability to pause and take the view in. This is where the top-deck bus ride helps: you often get a series of viewpoints in a row instead of one big stop and then long travel time.
One caution from real day-to-day experience: some walks described online can be longer or steeper than expected once you’re on the ground. For example, someone attempted the Narrow Neck trail after it sounded doable, but it turned out to be a steep, loose-stone stair situation. So treat these lookouts as viewpoint goals first, and treat any connected trails as optional expansions.
Leura Village: cafés, shops, and a different pace
Leura Village is included, and it’s a big reason this tour works as a full-day plan rather than just a waterfall-and-lookout circuit. This part of the day shifts from “big nature scenes” toward human-scale browsing: cafés, galleries, gardens, and a more relaxed town vibe.
If you want lunch in a place that doesn’t require you to plan ahead with parking, this is where you’ll likely feel the payoff. And if weather is changeable, village time is a good place to regroup.
Gordon Falls and Olympian Rock Lookout: nature scenes with drama
Later in the day, the route includes Gordon Falls and the Olympian Rock Lookout. This is another segment that benefits from hop-on flexibility. If you’re tired, you can shorten your visit. If you’re feeling good, you can slow down and take in the falls and the viewpoint connection.
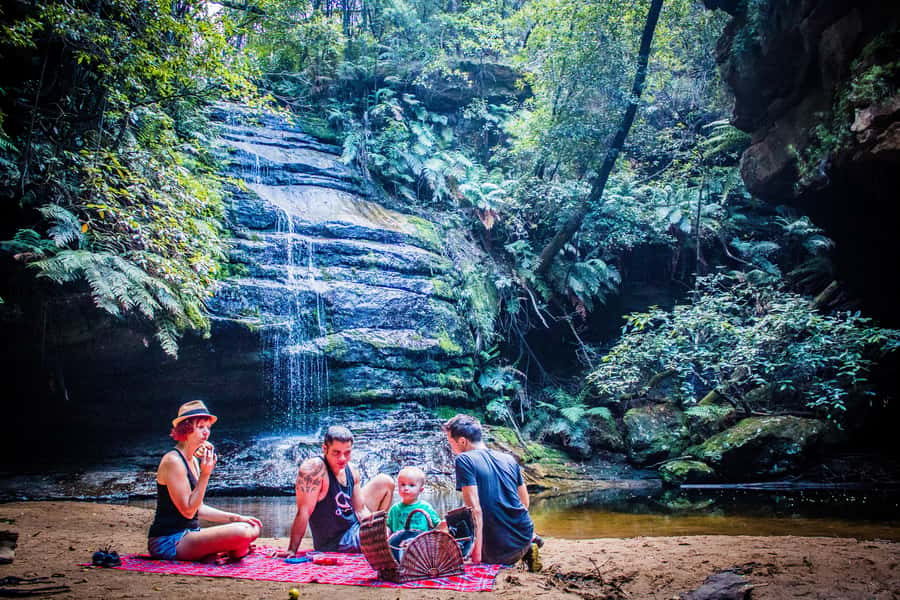
Pool of Siloam: swim-under-the-water energy
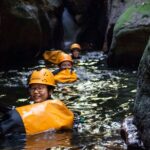
One of the more memorable options is Pool of Siloam, where you can rest and (if conditions allow) swim under the waterfall. This is the kind of moment that turns a sightseeing day into an experience you remember later.
It’s also one reason I insist on water and comfy footwear. Even if you only get a quick dip, you’re still moving around wet areas and paths.
Leura Cascades: finish with one last water-and-view stop
Finally, Leura Cascades rounds out the day with more waterfall scenery and a chance to end calmly instead of abruptly. It’s a good “linger” stop if you saved some energy, or a good stop to quietly wrap up if you want fewer steps and more sitting.
The guidebook + driver tips combo: why you get more than a bus ride
This tour includes a guidebook with maps and walking routes, and you also get live commentary from your driver-guide. That combo matters because it helps you answer the question that always comes up on the Blue Mountains: which walk is worth my time today?
In real-world terms, it means you can:
- pick a shorter route when the weather is iffy
- choose a longer walk when you feel good
- avoid backtracking by hopping off and then reboarding at the next stop
The onboard guidance can also be funny and storytelling-heavy, and that keeps long travel moments from feeling like dead time. Names that came up with standout personality and advice include Erin, Mark, and David, and even when the route is the same, the guidance changes how enjoyable the day feels.
Walking reality: what to pack and how to choose routes without stress

This tour asks for comfortable shoes, sunscreen, and water—and I agree with all three. The Blue Mountains can flip from cool to sunny fast, and even short walks can feel longer once you’re counting stairs and cliff steps.
Here’s how I’d choose routes in a practical way:
- Start with viewpoints that match your energy level (lookouts first, trails second).
- If you’re unsure about a trail description, treat it as a flexible plan—turn around if it stops feeling fun.
- If it’s slippery or you’re dealing with uneven ground, go slow. Some cliff-edge segments can be rocky and uneven, and one walk between Stop 6 and 7 was described as more moderate than advertised due to unevenness and slippery sections.
If you’re traveling with someone who has limited mobility, you can still use the pass, but you may spend less time off the bus and more time on the scenic stops. The good news is that the pass still gives you access to the viewpoints without the burden of driving.
Comfort, schedule, and the one thing that can slow you down
The buses are described as comfortable, with good sound systems and helpful drivers. That’s important because this tour leans on audio guidance. You’ll hear tips as you go, and that helps you decide where to hop.
The schedule is the potential slowdown: waiting for the next bus when you miss the timing window. A few people noted they spent time waiting when they couldn’t move quickly between stops. So be strategic with hop-offs:
- If you plan a long walk, don’t count on a same-stop connection.
- If you’re doing multiple stops in one stretch, assume you’ll have some idle time between the farthest points.
Also, keep your ear open for reboarding changes. There was at least one instance where the last pickup involved a different bus stop, and the lack of clear signage could cause stress. The fix is simple: listen to the driver’s instructions before you leave a stop, and confirm where to reboard.
Who this Blue Mountains Explorer Bus pass suits best
This tour is a strong fit if you:
- want to see the Blue Mountains from Katoomba and Leura without driving
- like flexible plans and self-paced walks
- want live commentary plus an easy navigation tool in your hands (the included guidebook)
- are traveling in a group with mixed walking styles
It may be less ideal if you want a fully guided, door-to-door itinerary with no decision-making at all. The freedom is real, but it comes with the need to choose your walks and manage the hourly timing.
Should you book this hop-on hop-off Blue Mountains tour?
Yes, I’d book it if your goal is to cover the Blue Mountains highlights with minimal hassle, especially if you’re arriving from Sydney by train and want a simple way to get around once you’re there. The value is strongest when you use the guidebook, listen to the driver’s advice, and treat the stops like options—not a checklist you must complete.
If your legs are limited or you’d rather avoid any tricky footing, you can still make this work by using more lookouts and shorter stops, but go in with realistic expectations about the walking involved around cliff-edge viewpoints and falls.
If you want maximum comfort for planning your day, starting around 9:15 AM is your best bet. It gives you more time to hop where you want before the bus loop gets busy.
FAQ
How long is the Blue Mountains Explorer Bus tour?
It’s a 1-day hop-on hop-off pass, valid for one day from first activation.
Where do I meet the bus in Katoomba?
You meet at the Booking Office at the top of the railway station steps in Katoomba and show your booking confirmation before boarding.
How often do the buses depart?
Buses depart Katoomba every hour. The first departure is 9:15 AM, and then buses continue hourly from 9:45 AM to 4:45 PM.
Which famous viewpoints are included?
The route includes Katoomba highlights such as the Three Sisters and Echo Point, with access via Prince Henry Cliff Walk from the area around Honeymoon Lookout.
What’s included with the ticket besides bus transport?
You get hop-on hop-off full-day access, driver/guide commentary onboard, and an included guidebook with maps and walking routes.
Is food included in the price?
No. Food and drinks are not included, so you’ll need to buy them separately.
What should I bring for the day?
Bring comfortable shoes, sunscreen, and water.
Is it wheelchair accessible, and are pets allowed?
The tour is wheelchair accessible, and pets are not allowed. Smoking is also not allowed.
Can I cancel and get a refund?
Yes. You can cancel up to 24 hours in advance for a full refund.